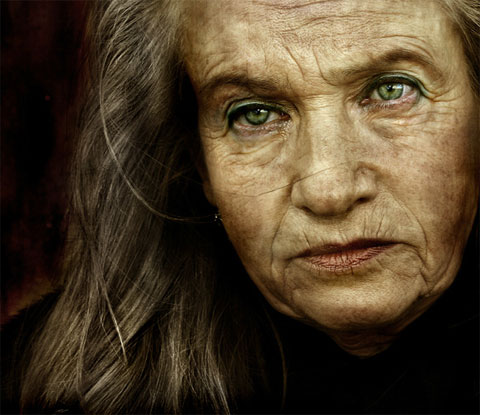
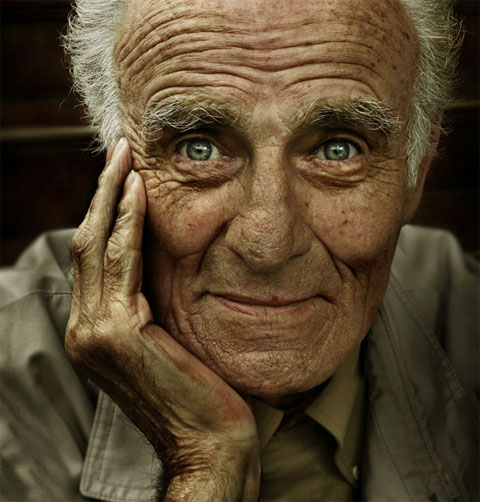
Andrzej Dragan, a quantum physics expert from Warsaw, is definitely by far one of my favorite photographers. Check out his unique photography portfolio, presenting how this wonderful artist has mastered a technique called “Painting with Light”.
Want to learn more about Dragan’s HDR technique? You can read about it in the book The Fundamentals of Photography by Helen Drew, or check out our HDR tutorial below where we attempted to describe in 10 main steps how to achieve the famous Dragan style.

Ready? Let’s begin.
1. Open your chosen image in Adobe Photoshop. Portraits work best with the Dragan HDR technique. Make sure you have a good photograph with distinct features, because what we are actually trying to do is to take shadows and highlights effects to the max and stop before getting an unnatural look.
2. Sharpen the image with Unsharp Mask filter (85%, 4.0pxl, 33levels)
3. Create a new Adjustment Layer Hue/Saturation (master, saturation -25%)
4. Create a new Adjustment Layer Selective Color (whites: yellow +50, black +28) (Neutrals: cyan +11, Magenta +17) (Yellow: +37, black +7)
5. Create a new layer. Layer mode normal 100% and start painting the photo’s background with a black color (#000000). What we are actually doing is enhancing the background and the photo’s subject contrast. The contrast feature is probably the most important of them all when considering the Dragan HDR Style.
6. Create a new layer. Layer mode multiply 100% and start painting the person’s edges with a bluish color (#232137). I used this color since this is the pictures prominent color.
7. Create a new layer. Layer mode multiply 75% and start painting the shadow parts with a brownish color (#482303).
Up until now, we have been working on the shadows of the photograph. Now it is time to enhance the highlights so we could achieve the perfect Dragan HDR technique.
8. Create a new layer. Layer mode overlay 50% and start painting with this flesh-tone color (#B48C78) giving the subject a bit of life.
Now, back to the black.
9. Create a new layer. Layer mode overlay 100% and start “burning” with a black color (#000000) certain areas trying to fine-tune the photograph and give it a little bit of drama.
10. Create a new layer. Layer mode overlay 60% and paint the white areas in the subject eyes with a white color (#FFFFFF) because we are actually trying to make the eyes gleam with a blazing effects. In order to enhance this effect, create another new layer. Layer mode color 50% and paint the eyes a bit green (#194442).
At the end you can continue the fine tuning of the general photo – It never ends until you say so. I actually found myself duplicating the sharpened layer and manually sharpening the subject most prominent features, around the eyes, mouth, hair and forehead. That’s it for this tutorial on how to achieve a Dragan HDR Style.
Before version:

and the After version:


Thanks forrrr this post ! Go on! sharing stuff like that
Sorry Creat new adjustment layer is this a blank layer or a duplicate of original?
To quote the above….
4. Create a new Adjustment Layer Selective Color (whites: yellow +50, black +28) (Neutrals: cyan +11, Magenta +17) (Yellow: +37, black +7)
_______________________________________
I assume (Yellow: +37, black +7) means +37 Yellow in the Yellow pallet?
_______________________________________
5. Create a new layer. Layer mode normal 100% and start painting the photo’s background with a black color (#000000). What we are actually doing is enhancing the background and the photo’s subject contrast. The contrast feature is probably the most important of them all when considering the Dragan HDR Style.
6. Create a new layer. Layer mode multiply 100% and start painting the person’s edges with a bluish color (#232137). I used this color since this is the pictures prominent color.
_______________________________________
You say in #4 to create a new adjustment layer…
In #5 you say create a new layer. When I do as you say and paint in the “flesh color” yes the flesh color paints as do the other colors/layers but it’s ugly and nothing else is happening. Am I missing something, or did you leave something out?
No problem.
By the way, just to clear things – this tutorial is my interpretation of the technique. I’m sure there are lots of ways to achieve this effect and more.
Keep at it!
I’m studying Photography and Digital Imaging and quiet recently I found Andrzej Dragan photos, and in the same time became his fun …I’ll be very pleased if you could send me more applied techniques …my email above.jo
thank you so much for this tutorial…really helpful!